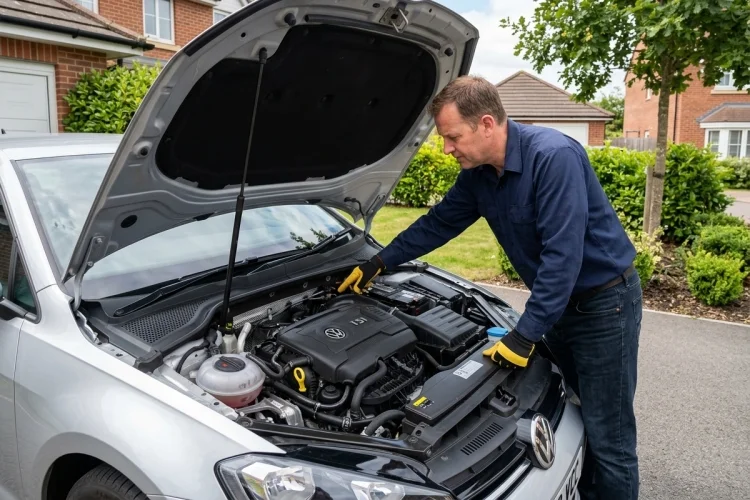
Opening a car’s bonnet can feel intimidating when you are unfamiliar with what lies underneath. The engine bay contains hot metal parts, electrical connections, moving belts, pressurised fluids, and dozens of hoses and wires that may all look equally important.
Fortunately, a basic visual inspection is much simpler than repairing an engine. You mainly need to know how to open the bonnet correctly, where it is safe to look, and which warning signs deserve professional attention.
Learning how to open and inspect a car engine bay safely can help you spot low fluid levels, damaged hoses, loose battery connections, and small leaks before they become more serious. It can also make routine maintenance feel less mysterious.
However, every vehicle is slightly different. Bonnet-release mechanisms, support systems, fluid locations, and checking procedures vary between models. Your owner’s manual should therefore be your primary guide, especially when identifying reservoirs or working around a hybrid system.
Here is a safe, beginner-friendly process for inspecting the area under your bonnet.
Prepare the Car Before Opening the Bonnet
Park the vehicle on firm, level ground away from moving traffic. Select Park in an automatic car or a suitable gear in a manual, apply the parking brake, and switch off the ignition.
Remove the key or keep the smart key away from the vehicle so the engine cannot be started accidentally. This precaution is especially important with hybrids, which may appear silent even when their drive system is active.
Unless the owner’s manual gives different instructions for a particular check, allow the engine to cool before inspecting it closely.
The engine, radiator, exhaust manifold, turbocharger, and surrounding components can remain hot after the vehicle has stopped. Toyota specifically warns that several under-bonnet parts may be hot immediately after driving.
Wear closed shoes and consider using safety glasses and disposable nitrile gloves. Personal protective equipment such as gloves and eye protection can reduce exposure to chemical, mechanical, and electrical hazards.
Remove loose jewellery, scarves, and clothing that might catch on a component. Tie back long hair before leaning over the engine bay.
Find and Operate the Bonnet Release
Most cars use a two-stage bonnet-release system. The first lever is usually located inside the cabin, often beneath the dashboard or near the driver’s footwell.
Pull the lever until you hear the bonnet release. The front edge should rise slightly, but a secondary safety catch will normally keep it from opening fully.
Walk to the front of the vehicle and feel beneath the bonnet’s leading edge for the secondary latch. Its exact position and direction vary, so consult the manual rather than forcing it.
Once the catch has been released, raise the bonnet carefully. Some cars use gas struts that hold it automatically, while others have a metal support rod that must be placed into a designated hole.
When using a support rod, hold it by its padded or marked section and make sure it is fully seated. Mazda advises confirming that the bonnet is properly supported because a partially opened panel can fall due to wind or vibration.
Never place your head or arms underneath a bonnet that does not stay securely open.
Know When You Should Not Open It
Do not immediately open the bonnet if steam is escaping from the engine compartment. Steam may be accompanied by pressurised, scalding coolant that can cause serious injury.
Move away from traffic, switch off the engine, and wait for the vehicle to cool. Mazda warns that even when visible steam has stopped, some components may remain dangerously hot.
Never remove a radiator cap or pressurised coolant cap from a hot engine. The cooling system may release boiling liquid and steam suddenly.
You should also avoid opening or inspecting the bay when you see flames, heavy smoke, sparking, or a strong smell of raw fuel. Move to a safe distance and contact emergency or roadside assistance instead.
After a collision, flood, or suspected electrical fault in a hybrid or electric vehicle, do not touch high-voltage components. Orange cables and connectors commonly identify high-voltage systems, and servicing should be left to properly trained technicians.
Begin With a General Visual Inspection
Before touching anything, spend a minute simply looking around. A visual overview can reveal plenty without exposing you to unnecessary risk.
Check for loose covers, damaged wiring, cracked hoses, disconnected plugs, corrosion, or components that appear out of position. Compare the left and right sides where possible, and use the engine-bay diagram in your manual to identify unfamiliar parts.
Look beneath the vehicle and around the engine for wet patches. Fresh oil is commonly brown or black, while coolant may be pink, green, blue, yellow, or another colour depending on the manufacturer.
Fluid colour alone does not provide a definite diagnosis. Water from the air-conditioning system, for example, can create a harmless clear puddle beneath the car.
Inspect rubber belts and hoses for visible cracks, cuts, bulges, blisters, or fraying. NHTSA recommends checking the cooling system for leaks and examining belts and hoses for deterioration as part of preventive vehicle care.
Do not pull aggressively on wiring or hoses. Your goal is to identify obvious changes, not to disassemble the vehicle.
Identify and Check the Main Fluid Areas
Most engine bays provide access to engine oil, coolant, brake fluid, and windscreen-washer fluid. Some vehicles may also have a power-steering reservoir, while others use electric power steering.
1. Engine Oil
Find the dipstick by using the owner’s manual or its usually brightly coloured handle. The correct checking procedure varies, but the car normally needs to be level and the engine switched off long enough for the oil to settle.
Remove the dipstick, wipe it with a clean lint-free cloth, reinsert it fully, and then remove it again. The level should generally sit between the minimum and maximum markings.
Some modern cars use an electronic oil-level display instead of a physical dipstick. Subaru and other manufacturers advise following model-specific guidance rather than applying one procedure to every vehicle.
2. Coolant
Check coolant through the transparent expansion reservoir when the engine is cold. The fluid should normally sit between the marked low and full lines.
Do not assume that plain water or any coloured coolant is suitable. Use the specification listed by the manufacturer, and investigate repeated coolant loss rather than continually topping it up.
Coolant helps prevent engine overheating, but safe checking depends on using the correct reservoir and waiting until the system has cooled.
3. Brake and Washer Fluid
The brake-fluid reservoir is commonly located toward the rear of the engine bay. You can usually inspect its level through the container without opening it.
Brake fluid is safety-critical and can damage painted surfaces. If the level is unexpectedly low, arrange an inspection instead of simply adding fluid without finding the cause.
Windscreen-washer fluid is normally the easiest fluid to top up. Confirm the correct cap first because confusing it with another reservoir can cause serious problems.
Stay Away From Moving and Electrical Parts
A switched-off engine does not mean every component is guaranteed to remain still. Electric cooling fans can start automatically when the engine compartment is hot or when certain systems are active.
Keep your hands, tools, clothing, and hair away from the fan, belts, pulleys, and other rotating components. Manufacturer guidance warns that cooling fans may operate unexpectedly even after the engine has stopped.
Avoid placing metal tools across battery terminals. A short circuit may create sparks, burns, electrical damage, or a fire.
White or blue-green corrosion around a conventional 12-volt battery terminal may indicate that cleaning or further inspection is needed. Do not handle leaking or physically damaged batteries without suitable knowledge and protection.
On hybrid and electric cars, do not open high-voltage covers, disconnect orange cables, or touch service plugs. A simple visual inspection should remain limited to the owner-accessible areas described in the manual.
Recognise Warning Signs That Need a Mechanic
A small amount of dust is normal. Heavy oil buildup, wet electrical connectors, strong fuel smells, melted wiring, or repeated fluid loss are not.
Arrange professional diagnosis when you notice cracked fuel lines, swollen coolant hoses, damaged belts, battery leakage, unexplained smoke, or deposits around a reservoir cap.
A mechanic should also investigate warning lights, overheating, rough running, or significant changes in engine noise.
Do not attempt to locate a fuel leak by running your fingers along a line. Modern petrol and diesel injection systems may operate under high pressure.
Similarly, never reach into the engine bay while another person starts or revs the engine. Basic owner inspections should be carried out with the vehicle safely switched off unless the manufacturer specifically requires another procedure.
Taking a clear photograph can help you monitor a possible leak or show a technician exactly what you noticed.
Close the Bonnet Correctly
Before closing the bonnet, check that every cap and dipstick has been refitted properly. Remove all cloths, bottles, gloves, torches, and tools from the engine compartment.
Tools or rags left under the bonnet can damage components or create a fire risk. Mazda specifically advises confirming that no loose items remain before closing the panel.
Return the support rod securely to its retaining clip if the car uses one. Lower the bonnet slowly and follow the manufacturer’s recommended closing method, which often involves releasing it from a short distance above the latch.
Do not slam it unnecessarily or press hard on a thin section of the panel. Once closed, lift gently at the front edge to confirm that the safety latch has engaged.
A bonnet that is not fully locked can open while driving and block the driver’s view. Always verify that it sits evenly and securely before returning to the road.
Learning how to open and inspect a car engine bay safely is a useful skill for every driver. Begin by parking securely, switching the vehicle off, allowing hot components to cool, and using the correct bonnet-release and support mechanism.
Once the bonnet is open, inspect the area visually before touching anything. Look for leaks, damaged hoses, worn belts, corrosion, and low fluid levels, while staying away from fans, pulleys, hot surfaces, and electrical components.
Always follow your vehicle’s manual because layouts and checking procedures vary. Make a simple under-bonnet inspection part of your monthly routine and perform another check before long journeys.
When you find smoke, major leakage, fuel odours, overheating, or electrical damage, stop inspecting and contact a qualified technician.